Note
Go to the end to download the full example code.
Validate image
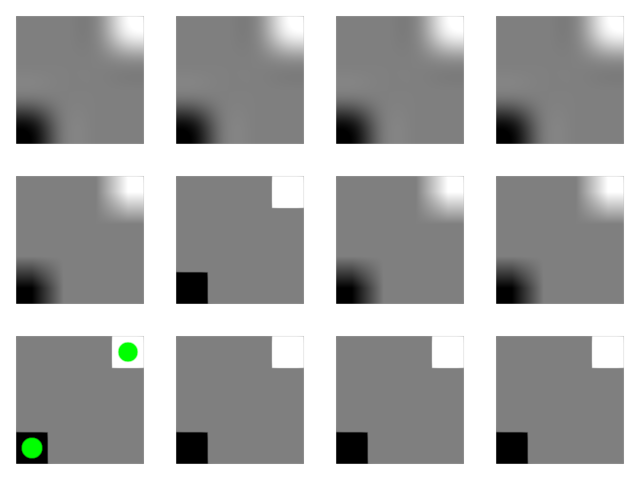
Show an image displayed the correct way.
The green dots should be at the corners that are darker/brighter.
The green dots should be in the center of these pixels.
The darker corner is in the bottom left.
This shows the same image for different interpolation methods, and is repeated for different dtypes, which leads to different WGSL for the sampling and uses different clim-corrections.
import numpy as np
from rendercanvas.auto import RenderCanvas, loop
import pygfx as gfx


canvas = RenderCanvas()
renderer = gfx.renderers.WgpuRenderer(canvas)
scene = gfx.Scene()

data = np.array(
    [
        [0, 1, 1, 1],
        [1, 1, 1, 1],
        [1, 1, 1, 1],
        [1, 1, 1, 2],
    ],
    np.uint8,
)

# Using different dtypes:
#
# float -> r32float, sampler
# uint8 -> r8unorm, sampler
# int16 -> r16sint, no sampler | later maybe r16snorm with sampler
# uin32 -> r32uint, no sampler

for dx, dtype in enumerate(["float32", "uint8", "int16", "uint32"]):
    typed_data = data.astype(dtype)

    for dy, interpolation in enumerate(["nearest", "linear", "cubic"]):
        image = gfx.Image(
            gfx.Geometry(grid=gfx.Texture(typed_data, dim=2)),
            gfx.ImageBasicMaterial(clim=(0, 2), interpolation=interpolation),
        )
        image.local.position = dx * 5, dy * 5, 0
        scene.add(image)

# Points go on the first (float / nearest-neighbour interpolated) image
points = gfx.Points(
    gfx.Geometry(positions=[[0, 0, 1], [3, 3, 1]]),
    gfx.PointsMaterial(color=(0, 1, 0, 1), size=20, aa=True),
)
scene.add(points)

camera = gfx.OrthographicCamera()
camera.show_rect(-1, 19, -1, 14)

canvas.request_draw(lambda: renderer.render(scene, camera))


if __name__ == "__main__":
    print(__doc__)
    loop.run()
Total running time of the script: (0 minutes 0.994 seconds)